Monday, 2 September 2019

Interfacing an 8x8 Matrix with Arduino, using MAX7219

When combined together in a symmetric manner, multiple LEDs can be used to display messages or patterns which look very aesthetic. Commonly, LEDs are arranged in the pattern of a square matrix, as it is easy to program and convenient to use. This tutorial utilizes an 8x8 matrix to display scrolling text.

Components required for this project:

1- Arduino

Any Arduino would do for this project.

2- 8x8 LED matix MAX7219 module

This LED matrix is driven by the MAX7219 IC. If not for this matrix, we would have to “scan” through each row at a very fast rate, to give the illusion of the text scrolling on the matrix. This project requires 16 digital/analog pins along with additional circuitry (transistors) which is very inconvenient. Another problem which would encounter sans the MAX7219 is that 64 LEDs would draw a huge amount of current, and this would also lead to LEDs glowing with uneven brightness, which does not look good at all. Henceforth, the MAX7219 not only saves us pins (it utilizes only 3 digital pins + one VCC pin + one GND pin = 5 pins in total) but also distributes current equally.

3- Bread Board (Optional)


Schematic, wiring, and pin table:


Before uploading the code, make sure you install the MaxMatrix library for Arduino.

Once you’ve installed the library, change the text that you want to scroll over the display and upload the code. The text should then scroll over the screen.

Also, these matrices can be daisy chained. Change the number of displays in use to add more displays.For more information visit our website :thinkrobotics


Monday, 5 August 2019

Ultrasonic sensor interfacing with output display on 8x32 LED Matrix

The HCSR04 ultrasonic sensor can sense the distance between itself and the object in front of it. It uses the formula d=(v*t)/2 to calculate the distance. We can display the output on an LED matrix, rather than viewing it on the serial monitor. This makes the project more portable and we can avoid having it attached to a computer for just viewing the distance. Here’s a tutorial on how to use the LED matrix.

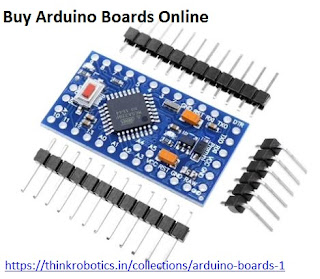
This tutorial will involve not only interfacing the ultrasonic sensor with Buy Arduino Board Online, but also displaying the output on an 8x32 LED matrix (or 4 8x8 LED matrices)

Components required

Any Arduino development board
A breadboard
A 8x32 LED matrix( or four 8x8 LED matrices)
An HCSR04 ultrasonic sensor
Jumper wires

Basic working of the project

The ultrasonic sensor emits a pulse. This pulse strikes the object and returns back to the sensor. Henceforth the overall distance travelled is 2 x D, considering that the distance one way is D. The velocity of sound in air is 340 m/s. Now once we obtain the total time taken, we can insert all three parameters into the equation v=2D/t. Rearranging the equation, it becomes D=v*t/2.

Henceforth using this formula, the distance is calculated.

The information is then processed by the Arduino, and then displayed on the 8x32 LED matrix, which is connected to the Arduino board by I2C bus. I have used an Arduino Mega henceforth the MOSI pin is 51, SCK pin is 52 and SS pin is 53. Find out your boards I2C pins before wiring.

Connections

The Echo pin of the ultrasonic sensor goes to digital pin 6 of the arduino and the Trig pin goes to digital pin 7.

To daisy chain the matrices, connect the dout pin of the first matrix to the din of second, CLK to CLK, CS to CS, VCC to VCC, and GND to GND.

I have already mentioned where to connect the DIN CLK and CS pin of the matrix in the working part.

Here’s a schematic to show you how the wiring looks like. I haven’t used a breadboard, but feel free to use one if you want to work with a breadboard.

Libraries and code.

Once you’re done wiring, install the adafruit GFX library and the MAX72xx Panel library. No need to install the SPI library as it is already included in the Arduino IDE by default.

Sunday, 5 May 2019

ThinkRobotics – Your Companion to Robotics and Technology Innovation


Robotics is a branch of engineering which involves mechanics, electronics, information technology, computer science and more. It deals with the process of designing, developing, programming and commanding, robots for various applications ranging from daily household chores to scientific research and development. With an increase in easy access of DIY electronics and robotics, the field of innovation is not limited to research institutes anymore but has branched out to amateurs, hobbyists and technology enthusiasts from different domains. 
Think Robotics is an innovator’s collective which endeavours to make the latest, high-quality and reasonably priced robotics components and hardware easily available to you with quick deliveries and best professional support. We understand that accessibility to the necessary equipment is crucial to turning ideas into reality. Bringing DIY solutions to your doorstep, we strive to be your constant companion on your way to path-breaking innovations.

You can choose to work on a beginner level robotics kit or an advanced challenging one. Whether you work on the DIY kits or build from scratch using electronics components like breadboards, microcontrollers, wires, input/output devices, sensors and so on, ThinkRobotics provides the latest and the largest collection of products to choose from as per suitability and need of your project. From classics to new favourites, from self balancing robot chassis to shock absorption tank chassis, from caterpillar crawler to the Wall-E crawler, we have exciting DIY projects for amateurs and professionals alike.
Enabling real world interaction with your projects, our wide range of input/output devices gives an extra edge to you projects with latest hardware. You can choose from a large collection of Display Modules, Buzzers, Keypads, WIFI, Stereo Radio and Gamepad Joystick Modules. Sensors with high accuracy and varied sensitivity levels give your robots high quality sensors abilities. Be it the basic temperature sensors, light sensors, humidity sensors and gyroscopic sensors or the latest camera modules, infrared remote control kits, pH detection, gas sensor or fingerprint modules, we have an ever growing range of sensors with all capabilities and designs.
A platform which provides not only hardware but also the necessary inspiration through detailed tutorials and instructional support, ThinkRobotics is a global community of creators and inventors. It’s a place where you can build your network of similarly driven and passionate technology enthusiasts, share your ideas and collaborate to build projects. Our in-house team of innovators and experts are passionate communicators who love to invent new projects, share ideas, answer queries and lead you to improvisation and successful completion of your projects. Whether you are working on a school or a college project, or you are participating in a competition or working on an innovative design, ThinkRobotics has you covered with the best of hardware and community support.